Always the outcast when she was younger, KristaG is a punk rock loving goth girl with a knack and passion for gaming, web design and cooking/baking. She, like many others, began with the most basic of mass marketed board and card games as a child and has since branched out into the realm of tabletop wargamming, Ameritrash, and Euro style board games. Some of her favorite games include Mice and Mystics, Guilds of Cadwallon, Super Dungeon Explore, Theomachy, Sentinals of the Multiverse, Malifaux, Dungeon Roll, Warhammer 40k, Star Realms, Magic the Gathering, and X-Wing: Miniatures Game. This love of gaming mixed with her degree in media has lead Krista to the GeekGirlProject where she writes game reviews and geeky gift guides.
Outside of her usual geek-ery and working in a restaurant, Krista enjoys fire spinning, creating stained glass pieces (nerdy and non), belly dancing, and training in Kung-Fu. She currently resides in Northern California with her favorite Malifaux Henchman and their lizard. You can contact her with questions, game suggestions, or just to say hello at Krista@thegeekgirlproject.com.
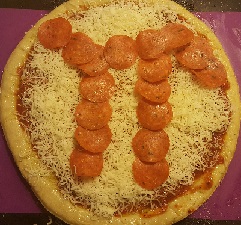
It’s that time of year again! March 14th or 3/14, to be exact, is known as Pi Day due to its resemblance to the mathematical constant of π (Pi). Last year for Pi Day, I threw a party and had myriad types of pies ranging from meat hand pies to the most commonly thought of type of pie – dessert! This year, however, I decided to feature one of my favorite types of pie: pizza! Now, I’m not just talking about the basic cheese, pepperoni, or supreme pizzas, but homemade, gourmet pizzas. These are fast, easy, and completely customizable for dietary needs or personal preference.
Fleischmann’s Pizza Crust Yeast. Regular active dry yeast can be used as well, but I really do like the way the crust rises with this!! (All photos were taken and edited by KristaG)
For some people, the types of crust that the pizza goes on can be more important than the toppings themselves. There are many different types to choose from when making your own: thin crust, deep dish, stuffed, classic, gluten free, flatbread, whole wheat, cornmeal, flavored crusts (like herb, sun-dried tomato or spinach), even pretzel crusts can be made at home! Some stores like Safeway or Kroger also sell take home pizza dough to save some time and there are also box mix options or Pillsbury Pizza Crust in a tube if you don’t want to make your own. Below, you will find my classic pizza crust recipe (it has been modified over the years from the one on the back of the Fleischmann’s Pizza Crust Yeast packages to fit my needs and my various baking conditions):
Ingredients:
2 – 2 ¼ c Flour
1 pkg Active Dry Yeast (I use Fleischmann’s – and they even make one specifically for pizza!)
¾ t Salt
1 ½ t Sugar
2/3 c Warm Water
2-3 T Olive Oil
Directions:
Preheat oven to 425 degrees.
Combine 1 cup flour, undissolved yeast, sugar, and salt in a large bowl. Add warm water (110-130 degrees) and oil. Mix until well blended; approximately 1 minute.
Add, gradually, enough remaining flour until a soft dough ball is formed. Dough should be slightly sticky.
Knead dough on a floured surface, adding flour if needed, until smooth and elastic; about 4 minutes. With floured hands, pat down the dough to fill a greased pizza pan or roll out into a 12 inch circle and transfer to a greased pizza pan.
Use preferred toppings and back on the bottom oven rack for 12-15 minutes or until cheese is bubbly and crust has begun to brown.
Spicy jalapeño pepperoni and cheese pizza with a 4 cheese tomato sauce with, of course, a π twist!
As for my toppings this year? Well, I’m actually making several different pizzas. Firstly, I’m doing a fig and goat cheese thin crust pizza with caramelized onions and arugula. No sauce, per se, but extra virgin olive oil will be brushed over the crust before I put on the toppings as I feel anything heavier would distort the flavors of the fig and cheese. I’m also making a pizza with pesto sauce, artichoke hearts, chicken, sweet and hot peppers, roasted red peppers, Mozzarella and Asiago cheeses, and fresh garlic cloves on a classic crust (one of my favorite pizzas ever to make, by the way!). For those wanting something more traditional, I am, of course, providing a spicy pepperoni pizza with a Pi Day twist!
Don’t have the time to make them yourself or have an untrustworthy oven (it has taken me years to learn how to work with mine and adjust to its quirks)? Papa Murphy’s customizable take and bake pizzas are always a great option or a stop by your local pizzeria so you don’t have to bake at all. Some locations, such as Pieology, even offer discounts, freebies, or pizzas specially priced for $3.14! Many of these deals are not just limited to pizzas, so check your area to see what’s available near you!
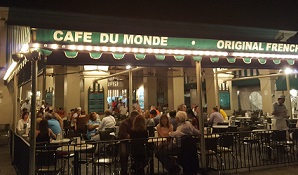
Cafe Du Monde! (All photos were taken and edited by KristaG)
As mentioned in my article, “Letting the Good Times Roll: Some Mardi Gras Inspiration for Game Night!,” I went to New Orleans, Louisiana last September. While there, I got to try all kinds of amazing foods that spanned a full pallet of flavors! Some, like the beignets from Cafe Du Monde, were very sweet and others, such as the corn and crab bisque that we were taught to make while attending a lesson at the New Orleans School of Cooking, were hot and spicy! This Mardi Gras, I’d like to pay homage to everything I learned in the Crescent City as well as upholding my own family’s traditions for the festival so I’m going to provide you with a little bit of both!
Several of the statues from Musical Legends Park
When I think back on my trip, I think not only of the fun and the people I encountered as part of the tour as well as the residents, but of the divine foods and how they seamlessly blend with the diverse types of music that is often filling the streets. In my opinion, the flavors of New Orleans are what leave the biggest impression on its visitors; they dance across one’s tongue almost as well as the patrons jiving to the live jazz all over town. With Zydeco and Dixieland/New Orleans Jazz playing in the background as I cook, I find myself transported back to the jazz halls and bars on Bourbon St. However, it also reminds me of the groups jamming on and in Franklin Avenue, which we only made the trek towards after a few restaurant and lounge suggestions from our gracious host from our evening at the New Orleans School of Cooking.
Corn and Crab Bisque as taught to me while visiting The Big Easy!
After that fabulous night filled with folklore, laughter, exceptional food and beer, and learning some new-to-me cooking techniques, I also walked away from my class from the New Orleans School of Cooking wth a few recipes – and, later, a cookbook! My favorites from the evening are the corn and crab bisque and the jambalaya recipes. As I’m already serving a mild shrimp gumbo on rice, I wanted to include something with some heat to it as well as a few less carbs so I decided to go for the corn and crab bisque as an option for my friends. This is a recipe you can make as mild or hot as you’d like and I tend to leave the bottle of liquid crab boil nearby so people can add more heat if they want it.
Corn and Crab Bisque from The New Orleans School of Cooking
Ingredients:
1 qt Milk
1 qt Heavy Cream
1 c Stock (chicken or seafood)
¼ c Flour
¼ c Butter
24 oz Whole Kernel Corn (with liquid)
2 c Chopped Green Onion, separated
1 lb Crab Meat (claw)
1 T Chopped Parsley (garnish)
Joe’s Stuff Seasoning, to taste
Salt, to taste
Rex Liquid Crab Boil, to taste (a little goes a long ways!)
Instructions:
Combine milk, heavy cream, and stock in a large pot. Bring to a boil, then reduce to a simmer for 10-12 minutes.
Combine flour and butter to make a roux; add to simmering pot once desired color of roux is reached.
Stir in corn with liquid and crab meat. Simmer for 5 minutes. Gradually add in 1 c of green onions, salt and seasonings to taste.
Garnish with parsley and green onions. Serve.
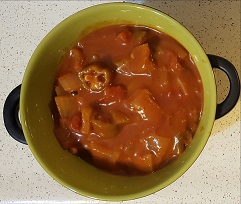
A steamy bowl of my grandmother’s shrimp gumbo. The recipe provided has been slightly modified from hers due to food allergies in my group.
For years now, I have made my grandmother’s shrimp gumbo for Mardi Gras. It has been one of my favorite recipes of hers for decades with the wonderful combination of shrimp, tomatoes, peppers, onions, and okra and I can already feel my mouth beginning to water just thinking about it! Most of my family doesn’t like a lot of heat to their food, so this is an extremely mild (no heat at all, honestly) gumbo recipe. It can be made ahead of time and stored in the freezer or stored after being made – just remember not to mix in the rice if you’re going to store it! The recipe below is a slightly modified version of my grandmother’s.
Shrimp Gumbo (Modified Slightly From Dorothy Wurz’s Recipe)
Ingredients:
¼ c Butter
2 T Flour
2 Cloves Garlic, minced
½ Green Pepper, thinly sliced
2 Onions, sliced
2 ½ c Tomatoes
2 ½ c Okra
1 6 oz. Can Tomato Paste
3 T Beef Bouillon (or 3 cubes)
4 t Worcestershire Sauce
½ t Chili Powder
1 Bay Leaf
3 c Water
1 ½ lb. Cleaned and Shelled Raw Shrimp
Salt and Pepper to taste
3 c Cooked Rice
¼ c Parsley
Instructions:
Melt butter. Stir in flour and cook over low heat until slightly brown. Add garlic, onions, and green pepper; cook slowly until tender. Add tomatoes and the rest of the ingredients except for rice, shrimp, and parsley. Simmer uncovered for 45 minutes. Cool; refrigerate until ready to serve.
To serve: heat tomato mixture over medium heat until just boiling; add shrimp. Simmer covered for approx. 5 minutes until shrimp are pink and tender. Combine rice with parsley. Plate rice and parsley combination and top with gumbo.
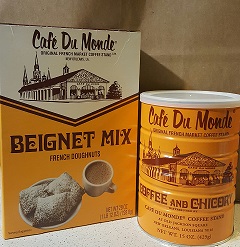
A taste of the Crescent City brought to my home! If you’re in a rush or are worried about finding a good recipe, Cafe Du Monde has put together a box mix and sells their coffees online and in some specialty stores!
What would a celebration be without dessert? Traditionally, there is a King Cake, but, as I didn’t have time to make one this year, I’m probably going to order one from my favorite local bakery: Ettore’s! They’re offering them in chocolate pecan, cherry, or apple this year and, I will admit, I’m having a hard time deciding which one I want. However, I’m also going to be serving beignets! Though I can also order these from Ettore’s (only on Tuesday, however!), I have decided to make them myself! There are tons of recipes available for these and some of them even have fruit in them! This year I will not only be making a few from scratch, but I also picked up a Cafe Du Monde box mix so I can compare my recipe to their mix. After serving Abita beer with the main courses, I’m going to serve my desserts with, you guessed it, chicory coffee!
Hope you enjoy these recipes and have a happy and safe Mardi Gras!
In December of 2015, The Key Armory introduced their first set of key designs through a Kickstarter campaign. Inspired by weaponry from various fandoms including Lord of the Rings, Star Wars, various video games, and animes, the first keys that were announced for the campaign were: the Hero’s Sword, King’s Blade, Kingdom Key, Star Saber, and Halfling’s Blade. Needing to raise $10,000 for their goal, there were also hopes for additional designs to be added as Stretch Goals. I joined in on the campaign in the fairly early stages and was thrilled to learn that the stretch goal key designs were actually going to be decided by the backers ourselves!
The Eye of Thundara key that I purchased as a birthday present for a friend from The Key Armory. (All photos were taken and edited by KristaG)
At the end of the campaign, the number of keys being offered had been doubled! We, the backers, had voted in another five designs: the Runeblade of Ner’zhul, Eye of Thundara, Gunblade Revolver, Royal Shield (not a sword, I know, and I was a bit skeptical of it at first until I saw the finished product), and the Blade of the Direwolf. As much as I had liked the original keys, I was really excited about the Runeblade of Ner’zhul as I am a rather large fan of World of Warcraft and immediately knew what key I had to have for myself! The timing for the suspected delivery for these also happened to be perfect for a birthday gift for a geek friend of mine so I also picked up a second key, the Eye of Thundara, as a surprise. Not only was he a fan of Thundercats, but it is a bit of an inside joke between us as well.
My house key! The Runeblade of Ner’zhul! I really wish I had a camera that could do these keys justice as the detail work on them is gorgeous!
I will admit, I had a few concerns about how the final product would look by the time I received it. My biggest concern was over how the details would look etched into the keys versus the cut out sections. Would the etched details be deep enough to show up? Would the different depths of the details still be visible enough from a distance to see what the sword looks like or would you have to use your imagination a bit more? I was also concerned about the actual size of the key. Obviously, these keys would be a bit bigger than your average house key, but just how big is “a bit bigger”? Would they be so gigantic that I would have to change how I keep my keys in my pocket? Should I just be considering using these as a display or novelty item instead of as a functional key to my home due to their potential size? I needn’t have worried, however! Upon their arrival, these keys have proven themselves to be sturdy, stunningly detailed with good craftsmanship, easy to get cut, a perfect fit on my keyrings (though I have enough keys to keep track of now that I no longer keep my keys in my pocket as much), and they have made some great conversation pieces!
The customer service at The Key Armory has proven to be top notch as I had several interactions with them after the campaign ended and I am looking forward to working with them again as they have launched their new Kickstarter campaign. This time they are not just introducing five more designs (the Soldier’s Sword, Sword of Foresight, Power Sword, Defender of the Universe, and Blade of Alfheim), but are also hoping to expand their offerings of keyway types to include Yale keys in addition to the Kwikset and Schlage keys that were offered in the last campaign. Personally, I’m thrilled as it means I can now pick up a few more keys as gifts for my friends overseas! As with their last campaign, there are more designs waiting to be added to the list of offerings and I can hardly wait to see what we add!
I can not recommend these keys enough. They’re fun, good quality, span numerous fandoms so that many of my geeky interests are met, the people at The Key Armory are just wonderful people to work with, and these keys are just amazingly detailed! I can honestly attest that everyone who has seen my house key has asked me either where I got it or if I will get them one too! Though a bit on the pricey side for key blanks (they go for $12 retail or $10 as part of the Kickstarter campaign), I still feel they’re worth picking up and, should you not want to use them for your home, they are something fun to simply collect and display.
Unfortunately, my Player 2 and I will be welcoming the Year of the Rooster by working a closing shift at the restaurant we both currently work in. However, this doesn’t mean we don’t still intend to celebrate earlier in the day. Instead of hosting a “game night,” we will be hosting more of an early afternoon gathering. With that in mind, I needed to come up with some foods that would be light enough to work as lunch time munchies, but would also work out for trying to host a game or two amongst friends. With this in mind and a quick perusal of my shelves of cookbooks, an idea quickly began to take form: DUMPLINGS!
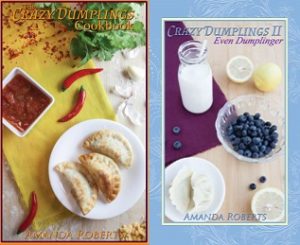
Crazy Dumplings I and II by Amanda Roberts. These recipes are perfect for Chinese New Year, game night, or any time you want something fun or different for mealtime! (All photos were taken and edited by KristaG)
Early last year while perusing Kickstarter, I came across a campaign that I absolutely couldn’t ignore: a new cookbook from Amanda Roberts. Having grown up eating both the traditional and American Chinese foods that mother had learned to make while working in a Chinese restaurant in her youth, I have collected quite a few Asian cookbooks over the years, but none thus far have been as fun as this one promised to be. Jiaozi/Gyoza/pot stickers/dumplings have always been one of my favorite items so I immediately jumped on the chance to help bring Crazy Dumplings II: Even Dumplinger to life! During the campaign, I also went ahead and picked up the cookbook that started the set: The Crazy Dumplings Cookbook. Ranging from traditional recipes to those inspired by various ingredients and combinations from across the globe and even a few with a geeky twist, there is sure to be a savory or sweet dumpling recipe for everyone within the pages of these two cookbooks!
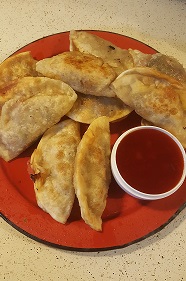
Our Sweet and Sour Chicken Dumplings! They are amazing and taste so much better than the frozen ones I get at the store due to their fresh ingredients. I can’t wait to make the rest of them this weekend!
For our gathering, we are choosing to keep it Chinese oriented (sorry Dr. Who fans, no fish and custard dumplings this time…but there is a recipe for that in the first book!) so in addition to my Player 2’s own beef filling recipe, we chose to try out Amanda Roberts’ General Tsao’s Chicken Dumplings, Sweet and Sour Chicken Dumplings, and Cola Chinese Chicken Dumplings. These will be followed up with a recipe from one of my grandmother’s cookbooks for egg custard tarts for dessert (another one of my favorites and a dessert that is not overly sweet). With this selection, we are hoping to include a little bit of sweet, some spicy, and some new flavors for our mid-day get together. Each recipe makes a dozen (12) dumplings, which I feel is the perfect amount for a meal for 2 yet also leaves room for us to use multiple recipes for game night and not overwhelming ourselves with too much food. In addition to the filling recipes themselves, there are also recipes for various dipping sauces and instructions for different dumpling folds included in both cookbooks! For anyone looking for a unique twist on a traditional food, something fun to try for Chinese New Year, or for a few new finger foods to out for game night, I would highly recommend either – or both – of the Crazy Dumplings cookbooks by Amanda Roberts! Personally, I am hoping to see Crazy Dumplings III come to fruition some time! In addition to being able to purchase these from Amazon.com, you can purchase them directly from Roberts’ blog: Two Americans in China.
As long as we are mindful of our sauces and dips, these should be perfect for setting up nearby as snacks for while we play. What are we playing this year, you ask? I’m introducing my game group to the new expansion for Lanterns: The Harvest Festival called Lanterns: The Emperor’s Gifts! You’re more than welcome to read my thoughts on the game and what the newest release from Renegade Game Studios adds and changes as well as learn more about how we are choosing to celebrate the Lunar New Year!
Along with all of the games we will be playing today, my crew and I are enjoying some swashbuckling inspired foods! Some of these are super easy to throw together and others require some serious prep time (there are time saving as well as gluten free alternatives included with my recipes and suggestions!). Many of the recipes are kid friendly as well so no one has to miss out on the festivities. Our menu includes a full variety of foods ranging from one-handed sandwiches to scurvy fighting fruit salads to a treasure trove of desserts and cocktails (mocktails too!).
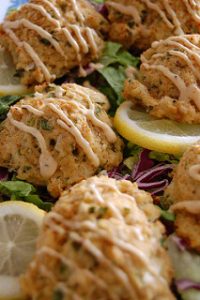
Years ago, while I worked for the university-run catering company at my alma mater, Radford University, I learned the recipe that we used for these amazing crab cakes! Where they got the recipe, I don’t know as they have been using it for well over a decade at this point. If anyone happens to recognize it, please let me know so we can give further credit to them. They can be made in any size you’d like (I’m making mine small enough to still be finger foods), the recipe is easily scalable, and these cakes can be prepared well ahead of time. Leftovers keep well, too! In addition to the crab cakes themselves, the creole remoulade topping is a really nice touch for adding an extra burst of flavor!
Ingredients
½ lb Backfin Crab Meat
1 lb Jumbo Lump Crab Meat
¼ cup Chopped Parsley
¾ cup Bread Crumbs
1 large Egg
¾ tsp Worcestershire Sauce
¾ tsp Lemon Juice
¾ tsp Seafood Seasoning
¾ tsp Dijon Mustard
½ cup Mayonnaise
Instructions:
Combine the egg, Worcestershire sauce, lemon juice, seafood seasoning, Dijon mustard and mayonnaise in a bowl.
Place the crab meat, parsley, breadcrumbs into a separate bowl. Mix lightly until combined. Add wet ingredients to the crab mixture and combine lightly. Portion into crab cakes and bake, broil, or pan fry until brown on both sides.
For the Creole Remoulade
1 cup Mayonnaise
4 Tbsp minced Cornichons
2 Tbsp minced Red Onion
2 Tbsp Capers, chopped
2 Tbsp finely chopped Red Bell Peppers
2 Tbsp finely chopped Yellow Bell Peppers
2 tsp Minced Garlic
2 Tbsp Fresh Lemon Juice
Salt, to taste
Black Pepper, to taste
Cayenne Pepper, to taste
Tabasco Sauce, to taste
Directions
Combine mayonnaise, cornichons, onion, capers, red and yellow peppers, garlic, and lemon juice in a bowl.
Add salt, black pepper, cayenne pepper, and Tabasco sauce to mixture.
Mix thoroughly and refrigerate.
Seaweed Wraps
Wrap sandwiches are some of my favorite snacks to make for parties. They’re usually fairly easy, have tons of filling options available, and can be served in varying sizes. For Talk Like A Pirate Day, I’m using smaller tortillas and serving these cut in half instead of serving them whole or as pinwheels. Listed below are some of my personal favorite recipes to use when making these!
Since I am calling these Seaweed Wraps to fit with my pirate theme, I wanted to incorporate as much of the theme into them as possible. While any kind of tortilla can be used, I opted to go with spinach wraps due to their green color. These can be purchased at various grocery stores or even made from scratch if you’re not pressed for time. (I have found that the homemade ones are far healthier than the store-bought ones as they contain more actual spinach in comparison) My favorite recipe to use when making my own is from Hot Pot Cooking and is as follows (you can also find tons of gluten free recipes for them online! One of my favorite ones is from Fork and Beans and can be found here):
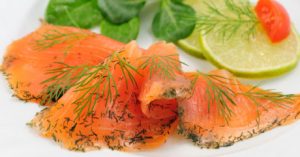
As for fillings, these can be filled however you’d like! Chicken Caesar wraps, BLT wraps, all veggies, etc. However, again sticking with theme, I chose to reach back to my Scandinavian roots and use a combination of gravlax (smoked salmon will work too if gravlax aren’t available in your area or you don’t have time to make them), fresh herbs, and avocado. The recipe below is slightly modified from the one found on Webopskrifter.dk and is for 4, but can easily be scaled to fit the needs of your pirate crew!
Ingredients:
8 Spinach Tortillas
1 8oz package of Cream Cheese
1 lb Gravlax (or Smoked Salmon)
4 Avocados
2 bunch Dill
4 bunches Parsley
1 medium Red Onion
1 lemon
Salt, as desired
Pepper, as desired
Directions:
Spread a thin layer of cream cheese on the tortillas and sprinkle with salt and pepper. Cover half of tortilla with a few pieces of salmon/gravlax.
Slice the avocados lengthwise, remove the pit and skin. Cut avocado into slices and cover with lemon juice. Place avocado in a strip in the center of each wrap.
Finely chop the red onion and sprinkle it over the entire wrap (as much as desired – I don’t use very much as I like to be able to taste my gravlax!). Rinse the herbs and spread them evenly over the avocado.
Roll the wrap. Cut. Serve chilled.
If you’re like me, you also have some friends or small children in your group that don’t like fish. With this being the case, I am also making Thai Chicken Crunch Wraps using a recipe that I found on one of my favored food blogs: Tastes Better From Scratch. These wraps offer a healthy, fish free alternative for my picky land lubbers! Don’t like wraps or don’t have the time needed to roll them all? You can also make “crabwiches” from croissants using “eye picks” (these are my favorite or you can even make your own by gluing some googly eyes to the end of a regular wooden or plastic toothpick!) to bring your little crabs to life or “starfish sandwiches” using a star shaped cookie cutter to cut your sandwiches into the perfect sized, star-shaped finger sandwiches! Much like with the wraps, these can be filled however you like so they are easily adaptable to any dietary needs or desires!
Any favored pasta salad recipe can work for this concept. All that’s really needed is the shell pasta substituted in. However, I’ve been trying to find some healthier alternatives to suit my desired changes for my lifestyle and I came across a really good tropical fruit and pasta salad recipe online! The recipe below is my adaptation of it as I didn’t really care for the fruit flavored pasta they included in the recipe. I also used a more carbs-sensitive pasta as it is a dietary need in my household, but you can use whatever pasta you’d like! Not a fan of the idea of pasta and fruit mixed together? That’s okay! A plain fruit salad can be prepared rather quickly and can be labeled as “Chum” or “Pirate’s Booty” to help stick with the theme!
Ingredients
½ lb Shell Pasta
2 tsp Lemon Infused Olive Oil
1 cup Fresh Pineapple, cut into bite-sized chunks (I make this optional as I really don’t care for pineapple)
1 cup Grapes
1 Kiwi, sliced into “half moons”
1 cup Cantaloupe, cubed
¼ cup Mint Leaves, minced
For the Sauce:
1 Mango, cubed
3 Tbsp Lime Juice
2 tsp Fresh Ginger, peeled and grated
1 Tbsp Honey
3 Tbsp Apple Cider
Directions:
Cook pasta in 6-8 quarts of boiling water for about 10-12 minutes. Do not overcook; you want the pasta to still be firm. Drain and place pasta in a large bowl.
Gently mix in sauce and fruits.
Cover with plastic wrap and refrigerate until thoroughly chilled.
Dead Men Tell No Tales 3-D Skull Cake
(photo taken and edited by KristaG)
Bryton Taylor’s original, gluten free recipe for her Kraken Rum Cake can be found on her blog Food in Literaturehere. I’ve modified it somewhat to use what I had on hand at home as well as switched it over to the US system of measurement and temperatures.
Ingredients
3 ½ cups All Purpose Flour
1 ½ tsp Salt
4 ½ tsp Baking Powder (trust me, this was the easiest way to have this conversion make sense on paper)
½ cup Cocoa
2 cup White Sugar
1 cup of Butter, softened
¾ cup Milk
¾ cup Kraken Rum
6 Eggs
For the Glaze
7 Tbsp Butter
¼ cup Water
1 cup White Sugar
¾ – 1 cup Kraken Rum
¼ – ½ cup Dark Chocolate Melts (I ended up needing more than ¼ cup as I felt it needed more flavor to it)
Directions
Combine flour, salt, baking powder, cocoa and sugar in a large bowl.
Cut in softened butter and beat together with milk, rum, and eggs until all smooth.
Baking the cake is where it gets interesting. As you can see, I used a 3D skull pan (mine is Nordic Ware, but Wilton makes one too – Wilton also makes a mini 3D pan so you can make smaller versions of this as well!) so I simply followed the directions that came with the pan. This can be done with any shaped pan you choose to use. If not using a shaped pan, this cake can make two 9” cakes and should be baked at 350 degrees for 30-45 minutes.
Directions
In a saucepan, melt together the butter, water, white sugar, rum and dark chocolate melts. Stir constantly until all is combined.
Once cake and glaze have cooled, pour the glaze over the cake until all is used.
While making my 3D cakes, I also used a dark chocolate fudge filling to keep the pieces together. This recipe is meant for making single layer cakes so I improvised. If you don’t want to use a glaze, Kraken rum can also simply be added to your favorite icing recipe!
As a kid friendly alternative for dessert, “Gold Dabloons” are some of my favorite, easy things to make. Using a package or two of oreos (any flavor will do) and a can of edible gold food spray, these cookies are sure to be a hit! The best part? They only take seconds to make!
Carribean Sea Water
(Image taken and edited by KristaG)
With all of these tasty snacks available, a very particular saying comes to mind: “water, water everywhere and not a drop to drink.” We don’t want that to be our situation so I’ve got several drinks on the menu for my cohorts, their kids, and myself! In addition to take care of those parched throats, what a better way to combat scurvy than with some citrus-y drinks? For those of age and desire, I have trussed up one of my favorite drink recipes with a new name to make it a little more “pirate-y.” The recipe below is for 1 drink, but can easily be scaled to fit the number of guests you have or even to fill a punch bowl!
Ingredients
1½ oz Tequila
1 ½ oz rum
1 ½ oz vodka
1 ½ oz Gin
1 ½ oz Blue Curacao Liqueur
1 splash 7-Up/Sprite/Sierra Mist
Sweet and Sour Mix
Directions:
Build drink over ice. Fill with Sour Mix and add a splash of 7-Up.* Serve.
* If making in a punch bowl, add ice and 7-Up right before event begins.
For the younger rapscallions or those landlubbers who choose not to partake, a fun alternative to water (or, in the case of my party, “Lagoon Water”) is my Pirate Punch! A mixture of ginger ale and orange juice can go a long way. Want to make this into a cocktail too instead of a mocktail? Simply add some Vodka to the mix!